Most Canadians know how to identify a maple tree just by looking at the leaves for that unique maple shape, but how can you tell which tree is a maple tree once all of the leaves are gone?
While at first it might be hard to tell the difference, maple trees have two very distinguishing features: the bark and the branching patterns.
Maple trees are unique as they are one of the few trees with opposite leaf buds. If you look closely you will see each pair of buds is rotated about 180 degrees from the previous set, which helps keep the tree in balance when the buds become branches. This means the tree’s branches will grow in opposite directions making it easy for you to tell that it is a maple tree.
Identifying a maple tree by its bark is a bit trickier as there is some variation between a young sugar maple and a mature one. A young maple’s bark will be stone-gray and very smooth, while a mature maple will have furrowed bark with large flat scales that seem to vertically peel off of the tree.
How to tap a sugar maple
Once you have successfully identified a maple tree it is time to tap it to access that delicious sap. A few things you should be aware of before tapping a tree is how old the tree needs to be, the temperature, and what tools you will need.
Age
Maple trees need to be mature before you can remove sap without harming the tree, much like how humans need to be a certain age before giving blood. To tell if a maple tree is mature you can look for the rough bark and measure the diameter of the tree at about shoulder length. The tree must be a minimum of 25.4+ centimetres in diameter for you to put one tap in, 45 cm for two taps, and 60 cm for three taps.
Temperature
Maple syrup season typically takes place between February and April when daytime temperatures reach above 0℃ followed by cold nights which is when the sap starts to flow. Maple syrup season ends when the buds on the branches begin to open leaving any sap collected after that point with a bitter aftertaste.
Tools
You will need a certain set of tools to successfully tap a maple tree, let’s call it your maple tool kit. For this tool kit, you will need a drill, a maple spile with a hook, a hammer, a sap bucket and bucket lids. You can get the spile and the bucket and lid from your local hardware store, farm store or sometimes local sugar bushes might have some available for sale. If your spiles do not come with hooks you will need to buy some separately.
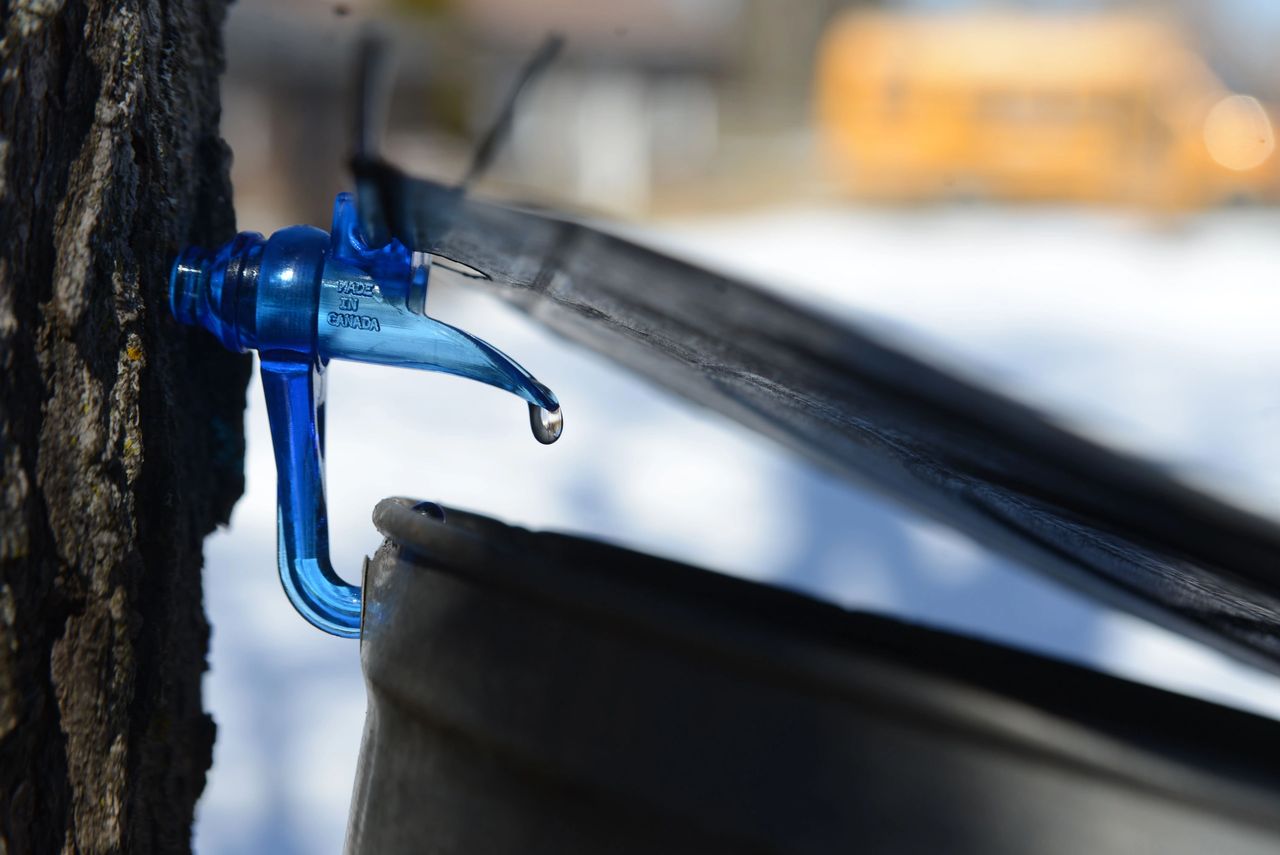
Start by drilling a hole five to eight centimetres at waist height, slanting the hole upwards, which will allow gravity to help with the sap flow. When drilling, make sure the hole is less than six centimetres deep or it could hurt the tree.
It is best to drill the hole on a day that is above freezing to prevent the bark on the tree from cracking which will allow the sap to drip out. If you are drilling later in the season sap may start flowing immediately from the hole.
After the hole is made, brush aside any shavings and insert your spile into the hole. Tap the spile gently with your hammer for a firm fit – but don’t pound on the spile or else it will not be able to be removed after the season is over. If a spile is not removed the tree is unable to seal over the hole.
After the spile is in hang the sap bucket on the hook and let nature takes its course! Congratulations you have now tapped your first tree!


